Aging Gracefully
Sorry, not in advance, to those who found their way to my blog in the hopes of maintaining their "29 again" status. Despite being a self-proclaimed cosmetic junkie, I'm not talking beauty products. This is a blog for art, not cosmetology. I'm talking craft products here, most importantly, Distress Inks.
Sometimes an art project requires a worn and weathered look. And sometimes it doesn't. It's art. Do what you want. If you want new paper to look old, well then keep reading, grab some Distress Inks and let's get started!
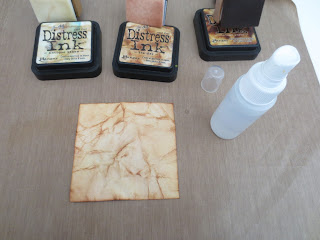
This is the goal. Before and after:
The supplies you will need:
Distress Ink: Antique Linen
Distress Ink: Tea Dye
Distress Ink: Vintage Photo
Distress Blending Tool
Spray Bottle of Water
White Card Stock (mine measures 4"x 4")
Distress Inks have a wide variety of shades to choose from. These are just the ones I decided to use. There are many others in the brown family that would work just as well if you don't have these particular colors or want to use something else. I'm a big proponent of using what you have in your supply stash.
Always start with the lightest color of ink. Daub the blending tool into the ink. Starting from the outside in, work the ink in a circular motion onto the paper.
Repeat the same steps with the next darker color.
Keep adding color until you reach your desired look. At this point I didn't add the darkest color yet because I wanted to save it to enhance more of the edges and cracks in the paper instead of making the paper look darker.
Spray your paper with water. Distress Inks seamlessly blend when they react with water, smoothing any harsh lines or marks you may have made while inking.
The paper is more pliable when it is wet. Now scrunch up the paper into a ball, flatten it out then scrunch it up again. Do this a couple of times to get a variable of creases in your paper.
This is when the darkest color comes into play.
Blend it over the many creases and on every edge. Spritz again with water.
Allow your paper to dry.
After my paper was dry, I went back with my Distress Tool and frayed the edges of my paper. If you don't have one, no big deal. You can use your finger nails or a file to go over the edges of your paper for that weathered look.


This is awesome! Thank you!
ReplyDeleteThis is awesome! Thank you!
ReplyDeleteThanks for checking out my blog! :)
DeleteThis technique is so fun. Thank you for sharing this.
ReplyDeleteThanks for checking out my blog :)
DeleteThis is so cool!
ReplyDeleteThanks Angel :)
ReplyDelete