Faux metal technique
Us artists/crafters know a thing or two about how to make things seem real when they're really faked to look that way, Ala the "distress or vintage" look. We can take a nice piece of paper, ink, stamp and spray it into something liken to an acid filled environment from a hundred years ago.
Even if you're a newbie to crafting or "distressing", I'm certain there's a hundred YouTube videos out there that can teach you this technique and even the one I'm about to share with you now. The more I make things the more I like making them look something they totally didn't look like to begin with.
Which brings me to a little something I made simply because I didn't have the intended product at hand. I really like the Tim Holtz metal photo corners that I've seen on several peoples' projects but I've just never thought of actually taking the plunge and making the purchase. I think it's more the fact that they retail for $7.99 and even if I had a coupon I would rather use it on something I'd use more of. Like, say paper, for instance.
 Okay, so I bought some new paper that was way more than $7.99...I have my priorities, you know!
Back to the faux metal technique...
I remembered I had a photo corner die, and you know I have paper, so I took it out along with my gold embossing powder, and this is what I did...
 I used a scrap piece of Bazzil cream card stock, VersaMark ink, American Crafts Zing embossing powder in Gold, Provo Craft corner die and of course, a heat gun (not pictured)
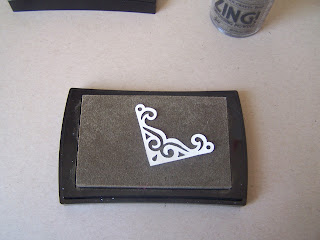 After running the die and paper through my Cuttle Bug twice, to make two pieces. I took the die cut and covered it completely with VersaMark ink. I just layed the piece onto my ink pad and pressed it in until it was completely covered.
 Then after removing the die cut from the ink pad, I covered the entire piece with gold embossing power, making sure to shake off the excess, and while holding it with tweezers I used my heat gun to melt all the embossing powder onto my die cut.
 This is the result after the initial coat of embossing powder.
 And this is the result with a second coat of embossing powder after repeating all the prior steps. I liked how it added more dimension and weight to the die cut.
I then used the piece on a challenge card I made for Creating the Crafty Life.
 I think this is a great way to add stability to fragile die cuts and also a way to customize your dies by using different colors of embossing powders.
Give it a try. I think you'll like your results!
Even if you're a newbie to crafting or "distressing", I'm certain there's a hundred YouTube videos out there that can teach you this technique and even the one I'm about to share with you now. The more I make things the more I like making them look something they totally didn't look like to begin with.
Which brings me to a little something I made simply because I didn't have the intended product at hand. I really like the Tim Holtz metal photo corners that I've seen on several peoples' projects but I've just never thought of actually taking the plunge and making the purchase. I think it's more the fact that they retail for $7.99 and even if I had a coupon I would rather use it on something I'd use more of. Like, say paper, for instance.

Back to the faux metal technique...
I remembered I had a photo corner die, and you know I have paper, so I took it out along with my gold embossing powder, and this is what I did...


I then used the piece on a challenge card I made for Creating the Crafty Life.

Give it a try. I think you'll like your results!


Comments
Post a Comment